")
The Perfect Peg Rail: Step-by-Step DIY for Any Space
If you need a little more storage but don’t want bulky shelves or cabinets, a peg rail is a great solution. It’s small, clean-looking, and surprisingly useful. You can hang coats in the entryway, mugs in the kitchen, towels in the bathroom, or bags in a bedroom.
The best part? It’s a beginner-friendly project. You don’t need fancy tools or advanced skills. With a few basic supplies and a free afternoon, you can build a small peg rail that looks custom and fits your space perfectly.
Let’s get started.
What Is a Peg Rail?
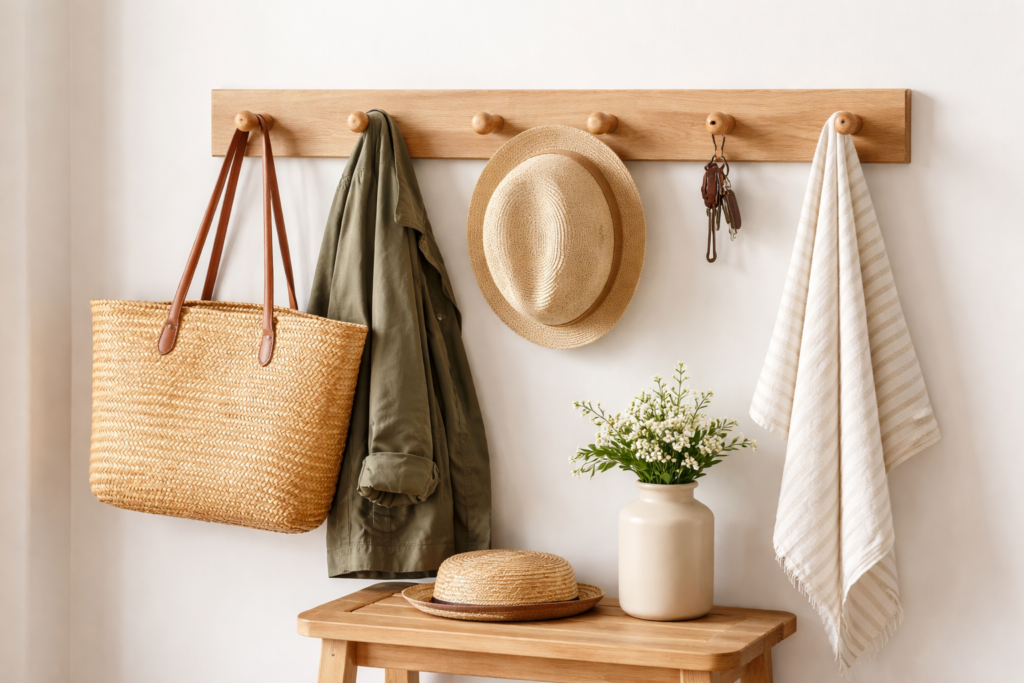
A peg rail is a simple wooden board with evenly spaced wooden pegs attached to it. The board mounts to the wall, and the pegs act as hooks.
Peg rails have been around for generations because they work. They’re sturdy, minimal, and fit almost any style from farmhouse to modern.
Tools and Materials You’ll Need
Here’s what you’ll need to build a small peg rail:
Materials:
-
1 solid wood board (1×4 works well)
-
Wooden dowels (¾-inch diameter is common)
-
Wood glue
-
Sandpaper (120 and 220 grit)
-
Paint or stain (optional)
-
Screws for mounting
-
Wall anchors (if not mounting into studs)
Tools:
-
Drill
-
Drill bit the same size as your dowels
-
Measuring tape
-
Pencil
-
Level
-
Saw (if you need to cut the board to size)
If you don’t own a saw, most hardware stores will cut the board for you.
Step 1: Decide the Size of Your Peg Rail
Start by deciding where it will go and how many pegs you need.
For a small entryway rail, 18 to 24 inches long works well. Three to five pegs are usually enough for a small space.
Tip: Leave about 4 to 6 inches between each peg so coats and bags have room.
Mark your peg spacing lightly with a pencil.
Step 2: Drill the Peg Holes
This is the most important step.
Use a drill bit that matches the size of your dowels. If you’re using ¾-inch dowels, use a ¾-inch drill bit.
Drill straight into the face of the board. Try to keep the drill level so the pegs don’t tilt up or down. Drill about 1 to 1½ inches deep.
Take your time here. Straight holes make a big difference in how the finished rail looks.
Step 3: Sand Everything Smooth
Before assembling, sand the board and the dowels.
Start with 120 grit sandpaper to smooth rough spots. Finish with 220 grit for a clean feel.
Run your hand across the surface. It should feel smooth with no splinters, especially around the holes.
Step 4: Attach the Pegs
Add a small amount of wood glue inside each drilled hole.
Push the dowels in firmly. Twist them slightly as you insert them to spread the glue.
Make sure they’re straight. Wipe off any extra glue with a damp cloth.
Let the glue dry fully according to the instructions on the bottle. Usually a few hours is enough, but overnight is safer.
Step 5: Paint or Stain (Optional)
You can leave the wood natural for a clean look, or paint or stain it to match your space.
-
Use light stain for a warm, natural feel.
-
Paint it white for a classic look.
-
Try black for something more modern.
Let it dry completely before mounting.
Step 6: Mount the Peg Rail to the Wall
Use a level to mark a straight line on the wall.
If possible, screw directly into wall studs for the strongest hold. If you can’t hit studs, use wall anchors.
Drive screws through the board and into the wall. Two screws are usually enough for a small peg rail, but use three if it’s longer.
Once it’s secure, give it a gentle tug to make sure it’s solid.
Where to Use a Small Peg Rail
Here are a few simple ideas:
-
Entryway for coats and hats
-
Kitchen for mugs or utensils
-
Bathroom for towels
-
Kids’ room for backpacks
-
Bedroom for bags and scarves
It’s a small project, but it can make a space feel more organized almost instantly.
Tips for a Clean, Professional Look
-
Keep peg spacing even. Measure twice.
-
Use hardwood for extra strength if hanging heavy items.
-
Lightly round the edges of the board with sandpaper for a softer look.
-
Don’t overload it. Small peg rails are best for light to medium items.
Final Thoughts
Building a small peg rail is one of those projects that feels satisfying from start to finish. It’s practical, affordable, and easy to customize to your space.
You don’t need to be an expert woodworker. Just measure carefully, drill straight, and take your time.
Once it’s up on the wall, you’ll wonder why you didn’t build one sooner.
If you try this project, think about where a second one might make sense. They’re simple, useful, and easy to build again once you’ve done it once.