")
Park Like a Pro: The Simple Guide to Installing a Garage Stop Block
Parking in a garage sounds simple, but it’s surprisingly easy to pull in a little too far. One small mistake and suddenly your wall, shelves, or stored items take the hit.
A parking stop block fixes that problem. It gives your tires a clear stopping point so you park in the exact same spot every time. No more guesswork. No more creeping forward and hoping for the best.
The good news is installing one is quick and doesn’t require advanced tools or special skills. Most people can finish the job in under an hour.
This guide walks you through the process step by step.
What Is a Parking Stop Block?
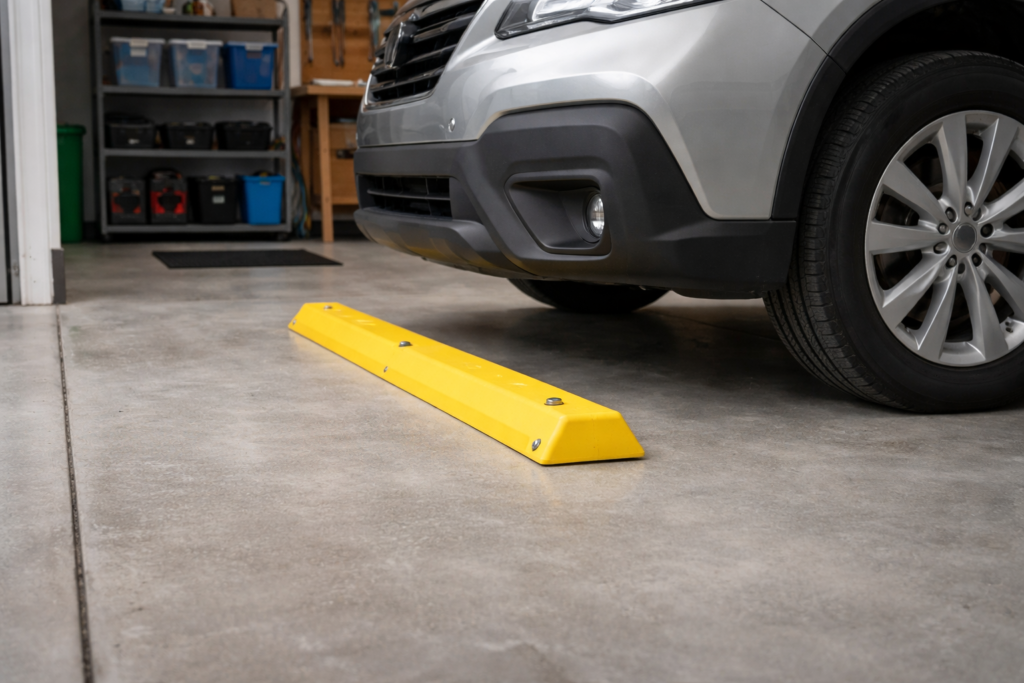
A parking stop block (sometimes called a wheel stop) is a low barrier that sits on the floor where your front tires stop. When your tires touch the block, you know you’ve pulled in far enough.
They are commonly used in parking lots, but smaller versions are perfect for home garages.
Most are made from rubber, plastic, or concrete. For home garages, rubber or plastic blocks are usually the easiest to install.
Tools and Materials You’ll Need
Before you start, gather these basic items:
-
Parking stop block
-
Measuring tape
-
Chalk or painter’s tape
-
Power drill
-
Masonry drill bit
-
Concrete anchors or bolts (usually included with the block)
-
Socket wrench or ratchet
-
Safety glasses
Having everything ready makes the installation go much faster.
Step 1: Park Your Car in the Ideal Spot
First, pull your car into the garage exactly where you want it to sit when parked.
Make sure:
-
You have enough space to walk in front of the car
-
Your garage door closes comfortably
-
You can open the trunk or hood if needed
Once the car is in the perfect position, place the parking stop block directly in front of the front tires.
This shows you the exact location where it should be installed.
Step 2: Mark the Installation Points
With the block in place, use chalk or painter’s tape to mark its position on the floor.
Then mark the holes where the anchors will go. Most parking blocks have pre-drilled holes for mounting.
Double check the alignment before moving the block. Small adjustments now save time later.
Step 3: Drill Holes Into the Concrete
Put on safety glasses and grab your drill with a masonry bit.
Drill into the concrete at the marked spots. The holes should be deep enough for the anchors to sit flush.
A few tips:
-
Drill straight down to keep anchors aligned
-
Clear out dust from the holes before inserting anchors
-
Take your time so the drill bit doesn’t wander
This step usually takes the longest, but it’s still quick.
Step 4: Position the Parking Stop Block
Place the parking stop block back over the drilled holes.
Line up the holes in the block with the holes you drilled in the concrete. This should match the markings you made earlier.
If everything lines up, you’re ready to secure it.
Step 5: Install the Anchors
Insert the anchors or bolts through the block and into the concrete holes.
Use a socket wrench or ratchet to tighten them until the block sits firmly against the floor.
Make sure the block doesn’t move or wobble when pushed.
Once secured, it should feel solid.
Step 6: Test Your Parking Stop
Now comes the easy part.
Slowly drive your car into the garage until the tires gently touch the block. You should feel a clear stop point without needing to creep forward.
Check that:
-
Your car is in the correct position
-
The garage door closes normally
-
There’s enough walking space around the vehicle
If everything looks good, the job is done.
Extra Tips for the Best Results
A few small details can make your setup even better:
Choose rubber blocks for home garages. They’re easier to install and quieter than concrete.
Install one for each parking space. This helps if multiple cars use the garage.
Use reflective strips. Some blocks include them, which helps you see the stop point at night.
Check the bolts once a year. Tightening them occasionally keeps everything secure.
Final Thoughts
A parking stop block is a simple upgrade that can save your walls, storage shelves, and front bumper from accidental bumps.
The installation is quick, the tools are basic, and the payoff is immediate. Once it’s in place, you’ll park perfectly every time without thinking about it.
If you’re tired of inching forward and hoping you stop in time, this small garage improvement is well worth the effort.