")
A Simple DIY Gravel Border That Makes Your AC Area Look Better
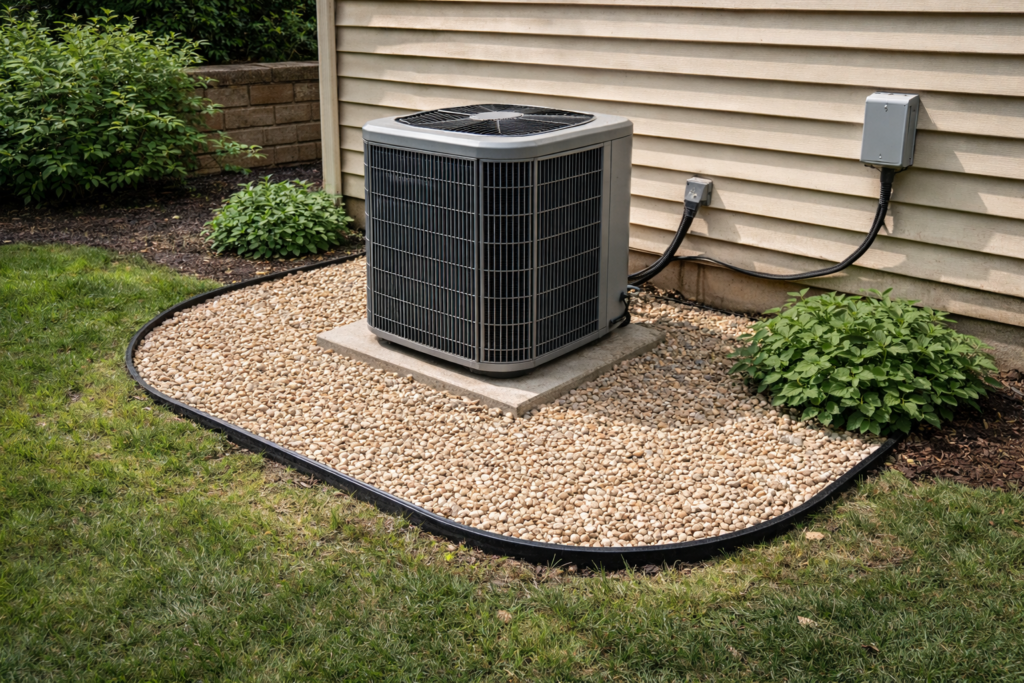
Your outdoor AC unit does an important job, but the area around it often gets ignored. Grass grows too close, weeds take over, and mud can build up after rain. A gravel border is a simple fix that makes the space look neat while also helping your unit work better.
Gravel allows water to drain away and keeps plants from crowding the system. It also makes mowing and yard care easier.
The good news is that you can build a gravel border in an afternoon with basic tools. Here is a simple step-by-step guide to help you do it.
Why Add a Gravel Border Around Your AC Unit?
Before jumping into the project, it helps to know why this small upgrade is worth the effort.
A gravel border can:
-
Improve drainage around the unit
-
Keep weeds and grass from growing too close
-
Reduce dirt and debris blowing into the system
-
Make the yard look cleaner and more organized
-
Make maintenance and mowing easier
It is a small project that can make a noticeable difference.
Tools and Materials You Will Need
Gather these items before starting:
-
Gravel or decorative stone
-
Landscape fabric
-
Shovel
-
Garden rake
-
Edging material (plastic, metal, or stone)
-
Landscape staples
-
Tape measure
-
Work gloves
Most home improvement stores carry everything on this list.
Step 1: Measure and Plan the Border
Start by measuring the space around your AC unit.
Leave at least 12 to 24 inches of open space on all sides of the unit. This gives it enough airflow and makes it easier for technicians to work on it.
Use spray paint or a garden hose to mark the outline of your border.
A simple square or rectangle works well, but you can also round the corners for a softer look.
Step 2: Remove Grass and Soil
Use a shovel to remove the grass and a few inches of soil inside the marked area.
Aim for a depth of about 3 to 4 inches. This space will hold the landscape fabric and gravel.
Once the soil is removed, use a rake to level the ground so the surface is even.
Step 3: Install the Edging
Edging keeps the gravel from spreading into your lawn.
Place the edging along the border line you marked earlier. Push or hammer it into the soil depending on the type you are using.
Make sure it sits firmly and follows the shape you planned.
Step 4: Lay Down Landscape Fabric
Landscape fabric helps block weeds while still allowing water to drain.
Roll the fabric across the cleared area and trim it to fit. Secure it to the ground using landscape staples every few feet.
Try to keep the fabric smooth so gravel spreads evenly on top.
Step 5: Add the Gravel
Now for the finishing touch.
Pour the gravel over the fabric and spread it with a rake. Aim for a layer that is about 2 to 3 inches deep.
Small decorative stones, pea gravel, or crushed rock all work well. Choose a color that matches your yard or home.
Step 6: Smooth and Check the Area
Rake the gravel so it spreads evenly across the border.
Make sure no stones are touching the AC unit directly. A small gap helps prevent vibration noise and keeps the unit easy to service.
Step back and check the look. You should see a clean border that frames the unit and separates it from the lawn.
Simple Tips to Keep It Looking Good
Once your gravel border is in place, it requires very little maintenance.
A few quick tips:
-
Remove leaves or debris every so often
-
Add more gravel if the layer becomes thin
-
Pull any weeds that sneak through the edges
With just a little care, the border will stay neat for years.
Final Thoughts
Building a gravel border around your outdoor AC unit is one of those small projects that pays off quickly. It keeps grass and weeds away, improves drainage, and makes the area look much more organized.
Best of all, it does not require special skills or expensive tools. With a few supplies and a bit of time, you can give your yard a cleaner and more finished look.
If you are already doing yard work this weekend, this is an easy project worth adding to the list.