")
A Cleaner Look: How to Build a Recessed Toilet Paper Holder Into a Wall
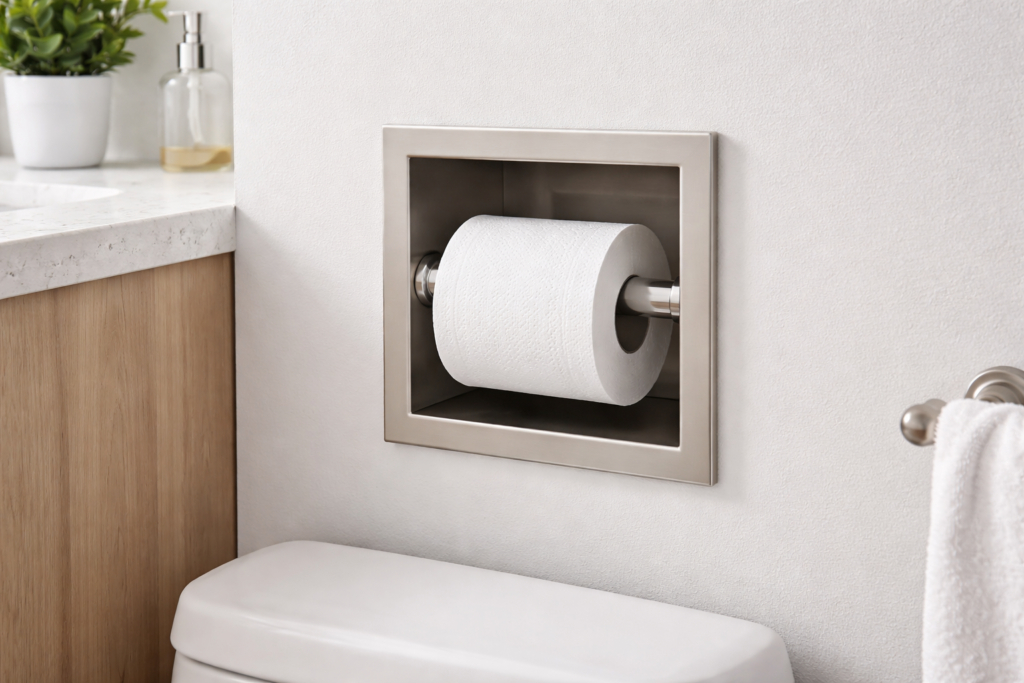
If your bathroom feels tight or cluttered, small changes can make a big difference. One of the easiest upgrades is swapping your standard toilet paper holder for a recessed one. It sits inside the wall instead of sticking out, which saves space and gives your bathroom a cleaner, more finished look.
The good news is you don’t need to be a pro to do this. With a few tools and some patience, you can handle it yourself in an afternoon.
Why Choose a Recessed Toilet Paper Holder?
A recessed holder isn’t just about looks. It’s practical too.
-
Saves space in small bathrooms
-
Reduces the chance of bumping into it
-
Looks neat and built-in
-
Easy to clean around
It’s one of those upgrades that feels small but makes the room look more put together.
What You’ll Need
Before you start, gather your tools and materials:
-
Recessed toilet paper holder kit
-
Drywall saw or utility knife
-
Stud finder
-
Pencil
-
Level
-
Measuring tape
-
Adhesive or screws (depending on the model)
-
Sandpaper (optional for smoothing edges)
Step 1: Pick the Right Spot
Start by choosing where the holder will go. Ideally, it should be easy to reach from a seated position.
Use a stud finder to check inside the wall. You want a space between studs, not directly on one. Most recessed holders are designed to fit standard spacing, but always double-check.
Tip: Hold the holder against the wall and sit on the toilet to test the position. It sounds simple, but it helps avoid awkward placement.
Step 2: Trace the Outline
Once you’ve picked your spot, hold the holder against the wall and trace around it with a pencil.
Use a level to make sure your lines are straight. A crooked holder will stand out more than you think.
Step 3: Cut the Opening
Carefully cut along the outline using a drywall saw or utility knife.
Go slow here. It’s better to cut slightly smaller and adjust than to make the hole too big.
Before cutting deep, check for wires or pipes behind the wall. If you’re unsure, stop and inspect the space first.
Step 4: Test the Fit
Slide the holder into the opening to see how it fits.
-
Too tight? Trim the edges slightly
-
Too loose? You may need wall anchors or adhesive support
You want it snug but not forced.
Step 5: Secure the Holder
Depending on your model, you’ll either screw it into place or use construction adhesive.
-
For screw-in models: attach it to the drywall or nearby studs
-
For adhesive models: apply evenly and press firmly into place
Hold it steady for a minute or two to make sure it sticks properly.
Step 6: Clean Up the Edges
If the cut edges look rough, lightly sand them down.
Some holders come with a flange that covers imperfections, so don’t stress if it’s not perfect. Just make sure everything looks neat from the outside.
Common Mistakes to Avoid
A few small missteps can make the job harder than it needs to be:
-
Skipping the stud check
-
Cutting the hole too large
-
Placing it too far forward or backward
-
Not leveling before cutting
Take your time with measuring and marking. That’s where most of the work really happens.
Final Thoughts
Installing a recessed toilet paper holder is one of those upgrades that feels simple but makes your bathroom look more intentional. It frees up space, reduces clutter, and gives the room a subtle upgrade without a full remodel.
If you’re looking for a quick weekend project, this is a solid choice. Once it’s in, you’ll wonder why you didn’t do it sooner.