")
A Simple Way to Hide the Mess: Build a Pull-Out Pet Feeding Drawer
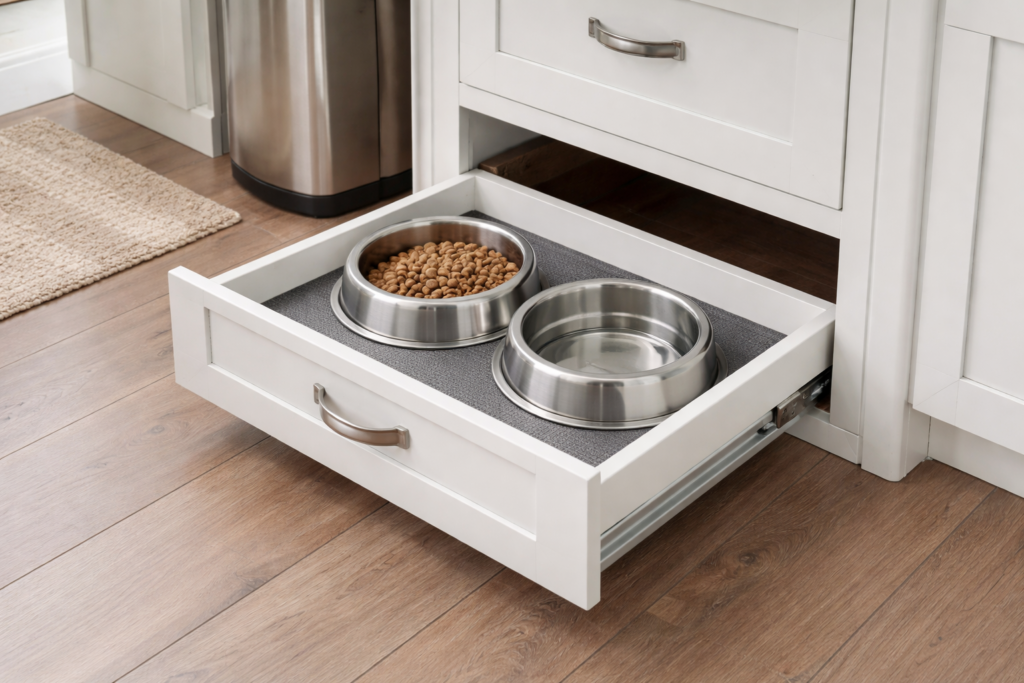
Pet bowls have a way of taking over your floor. They slide around, collect dust, and always seem to be in the way at the worst moment. If you’ve ever stepped in a water spill or kicked a bowl across the kitchen, you know the struggle.
A pull-out pet feeding drawer solves all of that. It keeps bowls tucked away when not in use and gives your pet a clean, stable place to eat. The best part is you can build one yourself without fancy tools or expert skills.
Here’s how to do it step by step.
What You’ll Need
Keep it simple. Most of these items are easy to find at a hardware store:
- A sturdy drawer (or wood to build one)
- Drawer slides (heavy-duty works best)
- Plywood or solid board (for the base)
- Measuring tape
- Pencil
- Drill and screws
- Jigsaw or hole saw
- Sandpaper
- Pet bowls (to measure cutouts)
Optional but helpful:
- Non-slip mat
- Paint or wood finish
- Cabinet handle or knob
Step 1: Pick the Right Spot
Start by choosing where the drawer will go.
Good spots include:
- Inside a lower kitchen cabinet
- Under a counter
- In a custom-built base near a wall
Make sure there’s enough depth for the drawer to slide out fully and room for your pet to eat comfortably.
Step 2: Measure Everything First
Before cutting anything, measure:
- The cabinet opening width and depth
- The height of your pet bowls
- Space needed above the bowls so your pet isn’t cramped
Add a little extra room so the drawer slides smoothly and doesn’t feel tight.
Step 3: Build or Prep the Drawer
If you’re reusing a drawer, check that it’s strong and clean.
If you’re building one:
- Cut wood panels to size
- Assemble a simple box shape
- Make sure the base is solid enough to hold food and water without bending
Sand down rough edges so it’s safe and smooth.
Step 4: Cut Holes for the Bowls
Place your bowls upside down on the drawer base and trace around them.
Then:
- Cut slightly inside the traced line so the bowls sit snug
- Test the fit before moving on
You want the bowls to rest securely without falling through.
Step 5: Install Drawer Slides
Attach the slides to:
- The sides of the drawer
- The inside of your cabinet or frame
Take your time here. If the slides aren’t level, the drawer will feel off when opening and closing.
Test the movement before adding anything else.
Step 6: Add Finishing Touches
Now make it look good and work better:
- Paint or stain the drawer to match your space
- Add a handle for easy pulling
- Place a non-slip mat under or around the bowls
- Seal the wood if you want extra protection from spills
Step 7: Test It with Your Pet
Slide the drawer out and place the bowls in position. Let your pet check it out.
Watch how they eat:
- Is the height comfortable?
- Are the bowls stable?
- Does the drawer stay steady when pulled out?
Make small adjustments if needed.
Why This DIY Project Is Worth It
A pull-out feeding drawer does more than save space.
It helps you:
- Keep your kitchen or feeding area clean
- Reduce spills and sliding bowls
- Hide clutter when guests are over
- Create a dedicated, tidy spot for your pet
It’s one of those small upgrades that makes daily life easier.
Final Thoughts
You don’t need to be an expert to build something useful. This project is simple, practical, and easy to customize based on your space and your pet’s needs.
Once it’s done, you’ll wonder why you didn’t build it sooner. No more tripping over bowls. No more messy corners. Just a clean setup that works.
If you try it, take your time with the measurements and focus on stability. That’s what makes the difference.
Happy building—and your pet will definitely thank you for it.