")
Make Cooking Easier: Install a Pot Filler Faucet Step by Step
Adding a pot filler faucet above your stove might feel like a luxury, but it’s one of those upgrades that quickly becomes a daily convenience. No more carrying heavy pots of water from the sink to the stove. You turn, fill, and get cooking.
The good news? Installing one is doable if you’re comfortable with basic tools and a bit of planning. This guide walks you through it in a clear, no-nonsense way.
What Is a Pot Filler Faucet?
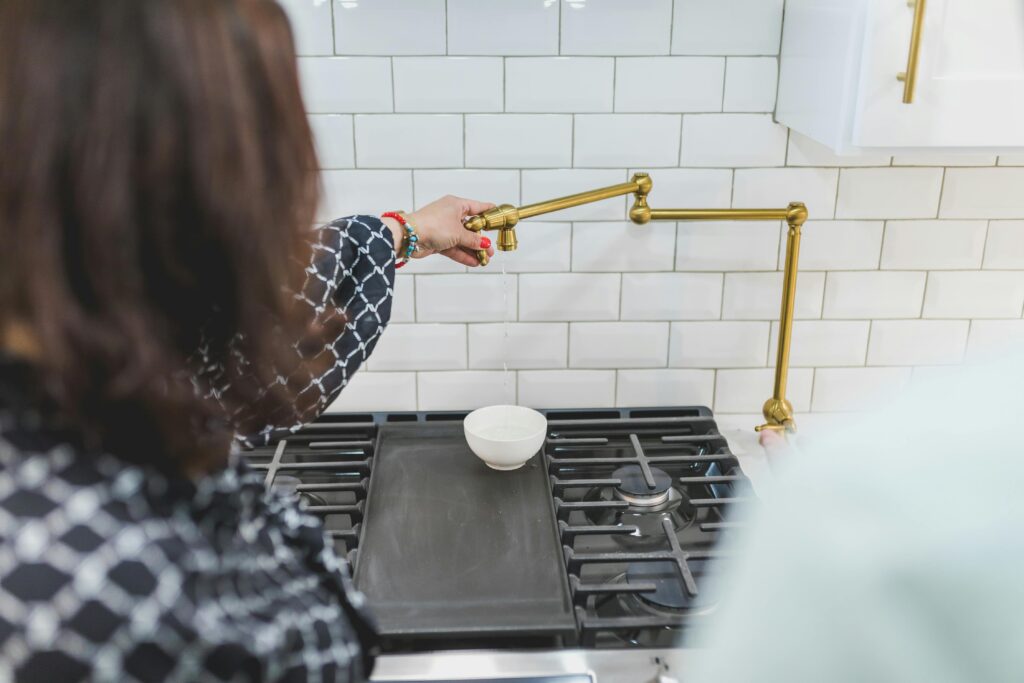
A pot filler faucet is a wall-mounted tap installed above your stove. It swings out to fill pots directly on the cooktop and folds back when not in use.
Simple idea. Big impact.
What You’ll Need Before You Start
Make sure you have everything ready before opening up your wall.
Tools:
- Drill
- Adjustable wrench
- Pipe wrench
- Level
- Measuring tape
Materials:
- Pot filler faucet
- Water supply line (usually ½-inch)
- Pipe fittings
- Teflon tape
- Shut-off valve (recommended)
Step 1: Choose the Right Spot
Height matters here.
Most pot fillers are installed about 12–18 inches above the stove. You want enough clearance for tall pots but not so high that it looks awkward.
Hold the faucet in place and test the reach. Make sure it can swing over all burners.
Step 2: Shut Off the Water
This step is not optional.
Turn off the main water supply before cutting into any pipes. Then open a nearby faucet to release pressure in the line.
Step 3: Access the Plumbing
You’ll need to connect the pot filler to a water line behind the wall.
If there’s no existing line, you’ll have to run one from a nearby cold water pipe. This might involve cutting drywall and installing new piping.
If that part feels out of your comfort zone, this is a good point to call a plumber.
Step 4: Install the Water Line
Connect a new pipe to your cold water supply.
Add a shut-off valve behind the wall if possible. It gives you control in case of leaks later.
Secure the pipe so it doesn’t move when you attach the faucet.
Step 5: Mount the Faucet Bracket
Most pot fillers come with a mounting plate or bracket.
- Hold it against the wall
- Use a level to keep it straight
- Mark the screw holes
- Drill and secure it tightly
A loose mount will cause problems later, so take your time here.
Step 6: Attach the Faucet
Wrap Teflon tape around the threaded pipe.
Then screw the faucet onto the water line. Tighten it with a wrench, but don’t overdo it. Too much force can damage the threads.
Make sure the faucet sits straight and swings smoothly.
Step 7: Turn the Water Back On
Slowly turn the water supply back on.
Check for leaks around the connection. If you see any drips, tighten the fittings slightly and test again.
Step 8: Test the Faucet
Swing the arm out over your stove and turn it on.
Watch how it flows and make sure:
- Water pressure is steady
- The faucet holds its position
- There are no hidden leaks
Common Mistakes to Avoid
- Skipping the shut-off valve: You’ll regret it if repairs are needed later
- Installing too high or too low: Measure twice before drilling
- Not checking for leaks right away: Small drips turn into bigger problems
Is It Worth Installing One?
If you cook often, yes. It saves time and effort, especially when filling large pots. It also adds a clean, modern look to your kitchen.
Just remember, it only provides cold water in most setups. You’ll still use your sink for everything else.
Final Thoughts
Installing a kitchen pot filler faucet isn’t as complicated as it sounds. With the right tools and a bit of patience, it’s a solid weekend project.
Take your time, double-check your measurements, and don’t rush the plumbing connections. A careful install now means fewer headaches later.
And once it’s in place, you’ll wonder how you ever cooked without it.