")
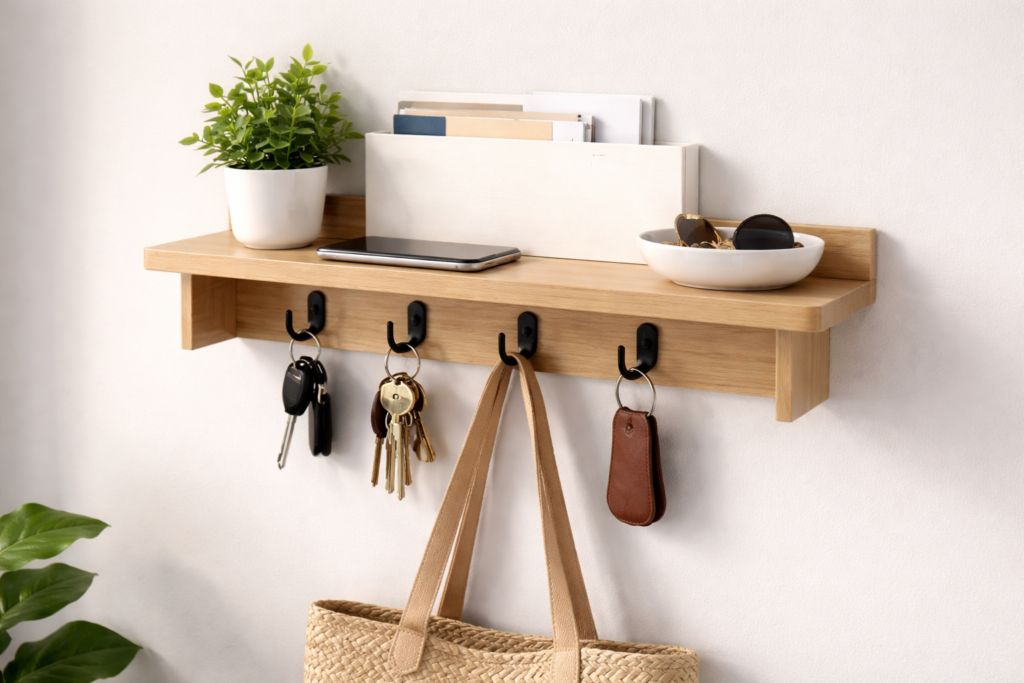
A Smart DIY Shelf to Keep Your Mail and Keys in One Place
If your entryway is always full of loose mail, missing keys, and random clutter, you’re not alone. Most homes need a small drop zone where everyday items can land the moment you walk in.
A compact wall shelf for mail and keys is a simple fix. It keeps your essentials in one spot without taking up floor space. Even better, it’s an easy DIY project that you can finish in about an hour.
In this guide, you’ll learn how to build a clean, practical wall shelf that holds your mail and gives your keys a dedicated place to hang.
Why a Small Entryway Shelf Makes a Big Difference
Before jumping into the build, it helps to know why this small project is worth doing.
A wall shelf near your door helps you:
-
Stop losing your keys
-
Keep mail from piling up on tables
-
Add useful storage without clutter
-
Make your entryway look more organized
And because the shelf is compact, it works well even in small apartments or narrow hallways.
Tools and Materials You’ll Need
You don’t need fancy tools for this project. Most people already have what they need.
Materials
-
1 wood board (about 16–18 inches long and 6 inches deep)
-
1 smaller board for the back (same length)
-
3–5 key hooks
-
Wood screws
-
Wall anchors
-
Wood glue
-
Sandpaper
-
Paint or wood stain (optional)
Tools
-
Drill
-
Screwdriver
-
Measuring tape
-
Level
-
Pencil
If you don’t want to cut wood yourself, most hardware stores will cut boards to size for you.
Step 1: Measure and Plan Your Shelf
Start by choosing where the shelf will go. The best spot is usually near the front door, around chest height.
Mark the area on the wall and check that the shelf won’t block light switches or door frames.
A good compact size is:
-
Width: 16–18 inches
-
Depth: 5–6 inches
-
Height: about 4 inches for the back panel
This gives enough space for letters and small items without sticking out too far.
Step 2: Sand the Wood
Before assembling anything, smooth the edges of the boards with sandpaper.
This step only takes a few minutes but makes the shelf look much cleaner and safer to handle.
If you plan to paint or stain the shelf, it’s best to sand lightly first so the finish sticks well.
Step 3: Attach the Back Panel
Place the smaller board along the back edge of the shelf board to form an “L” shape.
Apply a thin line of wood glue where the boards meet, then secure them with screws.
The back panel will serve two purposes:
-
It keeps mail from sliding off
-
It gives you a surface to mount the shelf to the wall
Let the glue dry for a few minutes before moving on.
Step 4: Install the Key Hooks
Flip the shelf over so the bottom side is facing up.
Measure evenly spaced points along the front edge and install your key hooks using small screws.
Most shelves look balanced with three to five hooks depending on the width.
These hooks will hold keys, small bags, or even dog leashes.
Step 5: Paint or Stain the Shelf (Optional)
If you want the shelf to match your home, now is the time to finish it.
Some easy options include:
-
White paint for a clean look
-
Natural wood stain for warmth
-
Matte black for a modern style
Let the paint or stain dry fully before mounting the shelf.
Step 6: Mount the Shelf to the Wall
Hold the shelf against the wall where you want it installed.
Use a level to make sure it sits straight, then mark where the screws will go through the back panel.
Drill pilot holes, insert wall anchors if needed, and screw the shelf into place.
Give it a gentle pull to make sure it’s secure.
Simple Ways to Make It Even More Useful
Once your shelf is up, you can add a few small touches to improve it.
Try placing:
-
A small tray for coins
-
A mini plant for style
-
A label or divider for incoming mail
-
A small basket for sunglasses
These small details turn a simple shelf into a practical entryway organizer.
Final Thoughts
A compact wall shelf for mail and keys is one of those small projects that solves an everyday problem. It keeps your entryway tidy, helps you avoid lost keys, and adds a bit of personality to your space.
Best of all, it’s quick to build and doesn’t require advanced tools or woodworking skills.
Once it’s up, you’ll wonder how you managed without it.