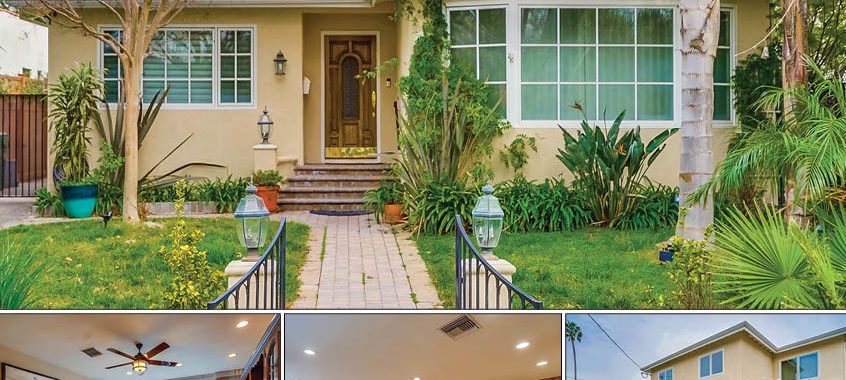
A room-by-room guide to preparing your San Fernando Valley home for professional listing photography that attracts serious buyers online.
In today's Los Angeles real estate market, the majority of buyers form their first impression of your home from a screen, not a driveway. Before anyone tours your property in Sherman Oaks, Studio City, Encino, or elsewhere in the San Fernando Valley, they've already scrolled through the listing photos and decided whether it's worth their time. That means the few hours your photographer spends in your home may be the single most important marketing investment of your entire sale. Here's how to make sure your home is ready to shine.
Declutter and Depersonalize Every Room
Wide-angle listing photos are unforgiving of clutter. Countertops, nightstands, and shelves that look "lived-in" in person often read as busy and messy through a camera lens. Clear kitchen counters down to just one or two intentional items, such as a bowl of fruit or a single plant. Remove family photos, personal collections, and refrigerator magnets so buyers can picture their own life in the space rather than yours. Closets and garages should be tidied too — buyers frequently ask agents for extra photos of storage areas, and a jammed closet can undercut an otherwise beautiful listing.
Deep Clean Beyond Your Normal Routine
Professional camera lenses and lighting setups pick up details that the human eye tends to gloss over: streaked windows, dusty baseboards, water spots on faucets, pet hair on furniture. Plan for a deep clean in the days before your shoot, paying special attention to windows and mirrors, since smudges are especially noticeable in bright, natural light. In kitchens and bathrooms, make sure grout, fixtures, and glass shower doors are spotless — these rooms tend to get the most scrutiny from online buyers.
Maximize Natural Light and Curb Appeal
Southern California's light is one of the best selling points our local homes have, and your photos should take full advantage of it. Open every curtain and blind, clean the windows, and turn on all interior lights, including lamps, even during a daytime shoot — this helps eliminate dark corners and gives rooms a warm, welcoming glow. Replace any bulbs that are burned out or mismatched in color temperature beforehand, since inconsistent lighting is difficult to correct in photo editing.
Don't overlook the exterior. In a market like ours, where indoor-outdoor living is a major selling feature, the front entry and backyard often carry as much weight as the living room. Mow the lawn, trim hedges, sweep walkways, and clear the driveway of cars a day or two before the shoot. Stage patio furniture, cushions, and any outdoor entertaining areas as though you're hosting guests — pools, fire pits, and covered patios are frequently among the most-viewed photos in Valley listings.
Stage With Intention, Room by Room
You don't need to hire a full staging company to make a strong visual impression, but small, deliberate touches go a long way:
- Bedrooms: Make beds with simple, neutral linens and remove excess pillows or throws that crowd the frame.
- Living areas: Angle furniture to open up walking paths and create a sense of flow and space.
- Bathrooms: Put away toiletries, hang matching fresh towels, and close the toilet lid.
- Dining areas: A simply set table or a centered decorative bowl can help a room feel intentional rather than empty.
- Pets: Remove pet beds, bowls, litter boxes, and toys, and plan to have animals out of the house during the shoot.
Also do a final walk-through to hide cords, remote controls, trash cans, and cleaning supplies that tend to sneak into the edges of photos.
Handle the Small Repairs Buyers Notice Online
Photography has a way of highlighting minor imperfections that you may have stopped noticing after years in the home: a chipped baseboard, a cracked switch plate, a dented garage door, scuffed walls near light switches. These are inexpensive, weekend-sized fixes that meaningfully affect how polished your listing photos appear. If your walls haven't been painted recently, a neutral touch-up in high-traffic areas can make rooms photograph as bright and move-in ready. Consider this the same checklist you'd tackle before a home inspection — it pays off twice.
Time It Right and Trust the Process
Schedule your shoot for a day when the weather forecast is favorable, since natural light dramatically affects photo quality, and avoid scheduling right after moving furniture or during a renovation's final days when dust and drop cloths are still around. It's also wise to do a walkthrough with your agent a day or two beforehand; a second, experienced set of eyes often catches staging details a homeowner has stopped seeing. Once the photography is complete, those images become the foundation of everything from your online listing to your social media promotion and printed materials, so it's worth getting it right the first time rather than scheduling a costly reshoot.
Every neighborhood in the San Fernando Valley has its own buyer expectations, from the classic ranch-style curb appeal prized in Sherman Oaks to the entertainer's backyards buyers look for in Encino and Studio City, and knowing how to present your specific property is part of what makes preparation so worthwhile. If you're planning to sell and want a personalized walkthrough of exactly what to prioritize before your photo shoot, reach out to The Michelle Hirsch Group at (818) 512-4226 or visit our contact page to get started. You can also browse our current listings to see how a well-prepared, professionally photographed home presents online — and start picturing your own home there next.