")
DIY Concrete Lamp Base: The Easy Way to Add Modern Style
If you’ve been looking to add a sleek, modern vibe to your space, a concrete lamp is a great choice. It’s sturdy, stylish, and surprisingly simple to make. You don’t need a workshop or special tools—just a few basic materials, a little time, and some patience while the concrete sets.
Let’s walk through how to make a concrete lamp base from scratch.
What You’ll Need
Before you start, grab these supplies:
- Quick-set concrete mix (you can find this at any hardware store)
- Mixing container (an old bucket or plastic bowl works fine)
- Mold (a plastic container, cardboard box, or even a juice carton)
- Lamp kit (socket, cord, and switch — available at most hardware or craft stores)
- Wooden or metal rod (for creating the hole where the lamp rod will go)
- Sandpaper (medium and fine grit)
- Spray sealer or clear acrylic spray (optional for a smoother finish)
Step 1: Prepare Your Mold
Your mold shapes the final look of your lamp base, so get creative. A square juice carton or plastic food container works great.
- Coat the inside with a light layer of cooking spray or petroleum jelly — this makes it easier to remove later.
- Mark the spot where the lamp rod will go, and tape your wooden or metal rod in place so it stays centered.
Step 2: Mix the Concrete
Follow the instructions on your concrete mix. Usually, you’ll add water slowly and stir until you get a thick, pourable texture (like pancake batter).
- Don’t rush this part — mix well so you don’t end up with air bubbles or dry chunks.
Step 3: Pour and Set
Carefully pour the concrete into your mold. Tap the sides gently to release any trapped air bubbles — this helps you get a smooth surface.
Let it sit undisturbed for at least 24 to 48 hours. The longer it cures, the stronger it gets.
Let it sit undisturbed for at least 24 to 48 hours. The longer it cures, the stronger it gets.
Step 4: Remove the Mold
Once the concrete is fully dry, gently remove your mold. If it’s cardboard or plastic, you can peel or cut it away.
Use sandpaper to smooth out any rough edges. You can keep it raw for an industrial look or give it a light polish for a cleaner finish.
Use sandpaper to smooth out any rough edges. You can keep it raw for an industrial look or give it a light polish for a cleaner finish.
Step 5: Add the Lamp Kit
Now that you’ve got your base, it’s time to make it shine.
- Thread your lamp cord through the hole.
- Attach the socket according to your kit’s instructions.
- Make sure everything is tight and secure.
This part only takes a few minutes and instantly transforms your block of concrete into a working lamp.
Step 6: Seal and Style
If you want a more polished look, spray the base with a clear acrylic sealer. It’ll make the color pop and protect the surface.
Finally, screw in your bulb, add a lampshade if you like, and plug it in.
Finally, screw in your bulb, add a lampshade if you like, and plug it in.
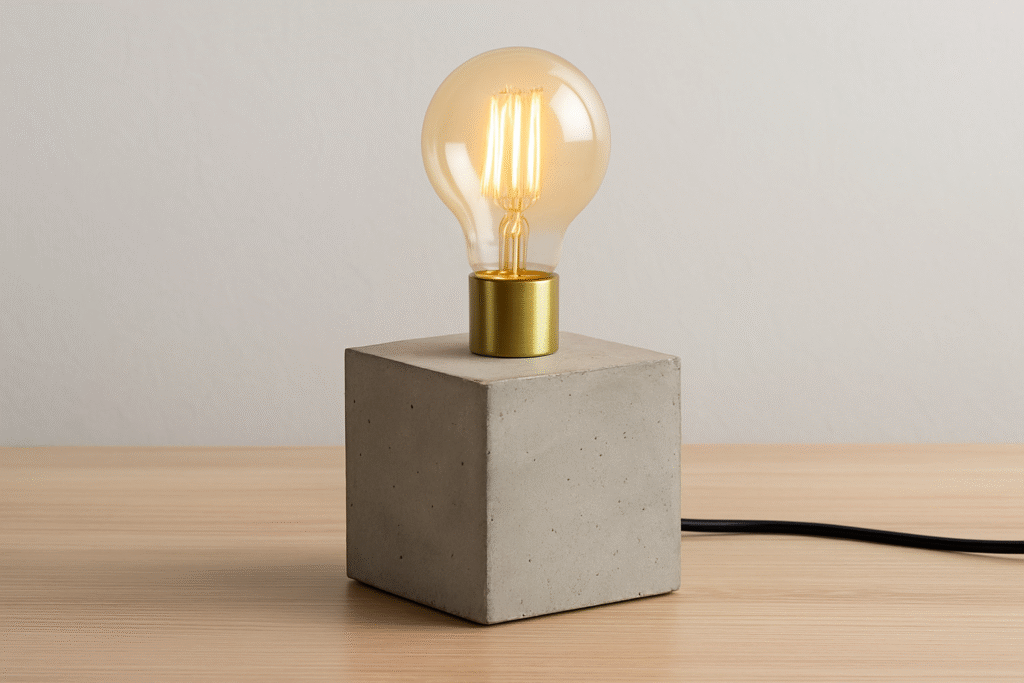
That’s it — your very own DIY concrete lamp base.
It’s sturdy, unique, and brings that modern, minimal edge that fits just about anywhere — from bedside tables to work desks.
It’s sturdy, unique, and brings that modern, minimal edge that fits just about anywhere — from bedside tables to work desks.
Concrete might seem like an unusual choice for a lamp, but that’s what makes it stand out. Plus, once you make one, you’ll realize how easy it is to customize. Try different shapes, mix in pigments, or even embed objects for a creative twist.
So grab a bag of concrete and give it a go — you’ll end up with a lamp that looks store-bought but feels 100% yours.