")
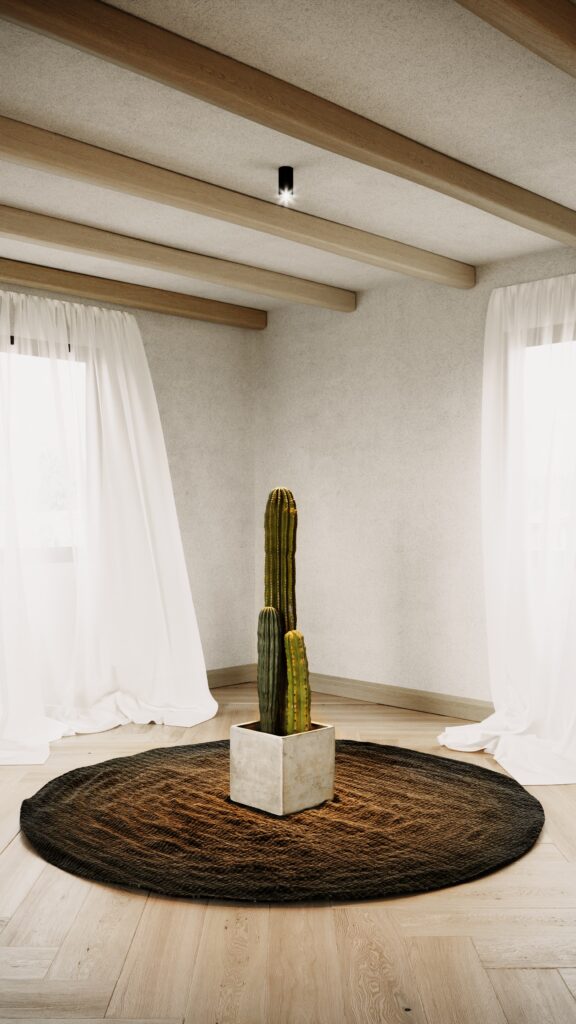
When it comes to interior design, adding rustic elements can instantly transform a space and give it a cozy, inviting feel. One way to achieve this is by incorporating wooden beams into your ceilings. However, real wood beams can be expensive and difficult to install. Luckily, there’s a cost-effective and easy-to-implement alternative: DIY faux wood beams. With a few simple materials and some creativity, you can bring the warmth and charm of rustic wood beams to your home without breaking the bank. In this article, we’ll guide you through the process of creating your own faux wood beams.
Materials Needed:
- Polystyrene foam boards
- Utility knife or foam cutter
- Measuring tape
- Wood grain tool
- Wood glue
- Wood stain or paint
- Paintbrush
- Sandpaper
- Polyurethane sealer (optional)
Step 1: Measure and Cut the Foam Boards
Start by measuring the length of the ceiling where you want to install the faux wood beams. Using a measuring tape, determine the dimensions and mark them on the foam boards. Carefully cut the boards to the desired length using a utility knife or foam cutter. For a more authentic look, consider varying the lengths of the beams.
Step 2: Create Wood Grain Texture
To mimic the appearance of real wood, you’ll need to create a wood grain texture on the foam boards. Using a wood grain tool, gently press and drag it across the surface of the foam boards, creating lines and knots that resemble the natural patterns found in wood. Experiment with different techniques and pressures to achieve the desired effect. Take your time during this step to ensure a realistic wood grain texture.
Step 3: Paint or Stain the Beams
Now it’s time to add color to your faux wood beams. You have two options: painting or staining. If you prefer a painted finish, choose a color that complements your existing decor and apply it evenly with a paintbrush. For a stained finish, select a wood stain that matches your desired aesthetic and apply it in the direction of the wood grain, using a paintbrush or cloth. Allow the paint or stain to dry completely according to the manufacturer’s instructions.
Step 4: Distress the Beams (Optional)
To enhance the rustic look of your faux wood beams, you can distress them by sanding the edges and corners. Use sandpaper to gently rough up the surface, focusing on areas that would naturally wear over time. This step adds character and makes the beams appear weathered and aged.
Step 5: Install the Faux Wood Beams
Before installing the beams, make sure your ceiling is sturdy and can support the weight. If necessary, consult a professional to ensure the safety of the installation. Apply wood glue to the back of each foam board and carefully press them onto the ceiling, aligning them with your measurements. Hold each beam in place for a few minutes to allow the glue to set properly. Use clamps or temporary supports to hold the beams in place until the glue dries completely.
Step 6: Seal the Beams (Optional)
For added durability and protection, you may choose to seal the beams with a polyurethane sealer. This step is particularly important in areas prone to moisture or humidity. Apply the sealer according to the manufacturer’s instructions, making sure to cover the entire surface of the beams. Allow the sealer to dry completely before proceeding.
Once the glue has dried and any optional sealer has set, step back and admire your newly installed faux wood beams. You’ve successfully added rustic charm and character to your ceilings with an affordable and DIY-friendly solution. These faux wood beams will provide a timeless and elegant touch to any space, whether it’s a cozy farmhouse-style kitchen or a rustic living room.
Remember, the beauty of DIY projects is the ability to personalize them. Feel free to experiment with different wood grain patterns, colors, distressing techniques, and beam arrangements to create a look that perfectly suits your taste and home decor. Enjoy the process and the satisfaction of transforming your ceilings into stunning architectural features with DIY faux wood beams.