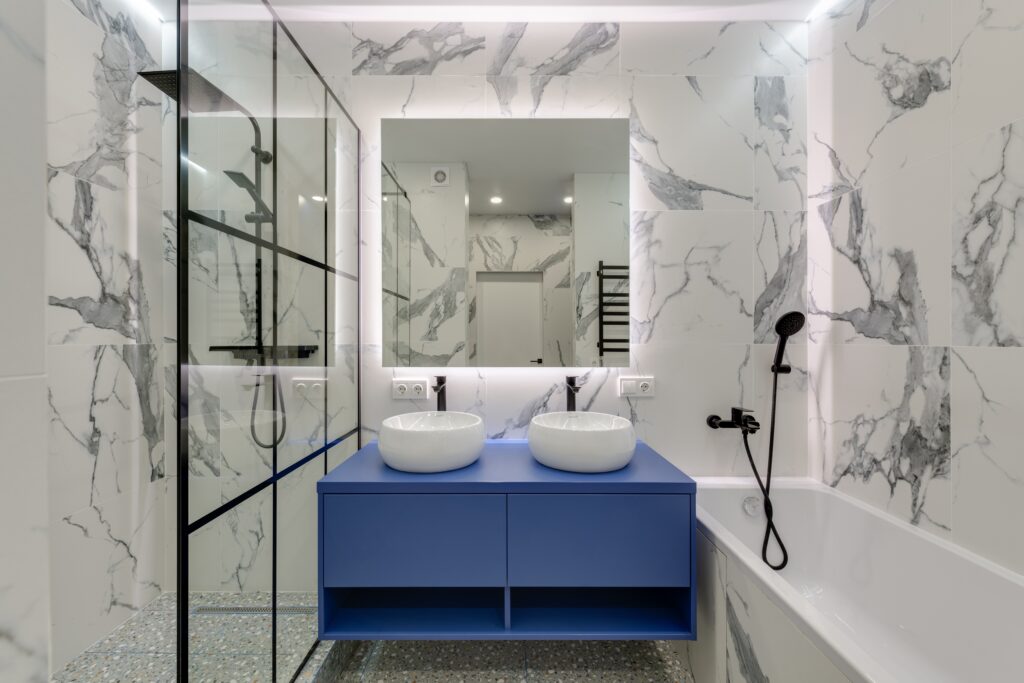
Your bathroom is one of the most important spaces in your home, and updating it with a touch of style can make a world of difference. If you’re looking to give your bathroom a makeover, a floating vanity is a trendy and functional addition that can transform the entire space. With a DIY approach, you can create a customized floating vanity that perfectly suits your style and budget. In this article, we’ll guide you through the process of building your own floating vanity and explore the many benefits it offers.
What is a Floating Vanity?
A floating vanity is a bathroom cabinet or countertop that is mounted to the wall, creating the illusion of it “floating” above the floor. Unlike traditional vanities that rest on the floor, a floating vanity gives your bathroom a sleek and modern look. It not only enhances the aesthetic appeal of the space but also provides some practical advantages.
Advantages of a Floating Vanity
- Space-Saving: One of the major benefits of a floating vanity is that it saves space. By elevating the vanity above the floor, you create an open and airy atmosphere, making the bathroom appear larger. This is particularly useful in small bathrooms where every inch counts.
- Easy Cleaning: Cleaning becomes a breeze with a floating vanity. Since there are no legs or baseboards to work around, you can easily sweep or mop the floor beneath the vanity without any obstructions. This feature is especially convenient if you have kids or pets that tend to leave a mess.
- Customizable Design: With a DIY approach, you have full control over the design and materials of your floating vanity. You can choose from a variety of finishes, colors, and hardware options to match your bathroom décor. Whether you prefer a rustic wooden look or a sleek modern style, the possibilities are endless.
Building Your DIY Floating Vanity
Materials needed:
- A solid wood plank for the countertop
- Plywood for the cabinet structure
- Wall brackets or a cleat system for mounting
- Screws, drill, and other necessary tools
- Sink, faucet, and plumbing supplies
- Sandpaper, paint, or stain for finishing touches
Step 1: Design and Measurements
Start by determining the size and shape of your floating vanity. Measure the available space in your bathroom and consider the plumbing and electrical requirements. Sketch a design plan that includes the dimensions of the countertop, cabinet, and sink.
Step 2: Building the Cabinet
Cut the plywood into the desired dimensions for the cabinet. Construct a sturdy box using screws and wood glue. Ensure that the cabinet is strong enough to support the weight of the countertop and sink.
Step 3: Mounting the Vanity
Decide on the mounting method for your floating vanity. You can use wall brackets or install a cleat system. If using wall brackets, locate the studs in the wall and securely attach the brackets. Alternatively, a cleat system involves mounting a horizontal support board to the wall and attaching the vanity to it.
Step 4: Installing the Countertop and Sink
Attach the solid wood plank to the top of the cabinet using screws from underneath. Ensure that it is securely fastened. Then, install the sink and faucet according to the manufacturer’s instructions. Connect the plumbing and check for any leaks.
Step 5: Finishing Touches
Sand the vanity to smooth out any rough edges. Apply a coat of paint or stain to enhance the appearance and protect the wood. Consider adding a waterproof sealant to prevent water damage.
Transforming Your Bathroom
Once you have completed the construction and installation of your DIY floating vanity, step back and admire the stunning transformation it brings to your bathroom. Not only does it provide a functional space for your daily routines, but it also adds a touch of style and elegance.
To complement the floating vanity, consider incorporating other elements such as floating shelves, wall-mounted mirrors, or decorative lighting fixtures. These additions can further enhance the visual appeal of your bathroom while maximizing the available space.
Remember, building a floating vanity requires some woodworking skills and knowledge of basic plumbing. If you’re unsure about any aspect of the project, consult a professional or seek guidance from experienced DIY enthusiasts.
In conclusion, a DIY floating vanity is an excellent way to revamp your bathroom and create a stylish and functional space. By utilizing a few tools and materials, you can design and construct a customized vanity that fits your personal taste and elevates the overall aesthetics of your bathroom. Embrace the floating trend and enjoy the benefits of a space-saving, easy-to-clean, and visually pleasing vanity that adds a touch of sophistication to your home.

