")
Turning Kitchen Scraps into Garden Gold
If you’ve ever wanted to turn your food scraps and yard waste into rich compost but don’t love the look of plastic bins, a wooden compost bin is a perfect DIY project. It’s simple, affordable, and looks great in any garden. The best part? You can customize it to fit your space and add a hinged lid to keep critters out while keeping things neat and tidy.
Here’s how to build your own sturdy wooden compost bin in a weekend—with just a few basic tools and some good old-fashioned elbow grease.
What You’ll Need
Materials:
- 6–8 wooden pallets or weather-resistant boards (cedar or pine works well)
- 2–3 sturdy hinges
- Screws or nails
- A latch (optional, but handy for keeping the lid shut)
- Chicken wire or mesh (optional, for better airflow)
Tools:
- Saw (hand or circular)
- Drill or hammer
- Measuring tape
- Screwdriver
- Safety gear (gloves, goggles, etc.)
Step 1: Plan Your Size and Location
Pick a level spot in your yard that gets partial sun and is easy to reach from your kitchen. You’ll want enough room to turn the compost with a pitchfork or shovel. A common size is about 3x3x3 feet—big enough to hold material but small enough to manage.
Step 2: Build the Frame
Use your pallets or boards to make the four sides of the bin.
- Attach the back and sides first to form a “U” shape.
- Leave small gaps (about half an inch) between boards to let air in.
- Add the front panel last, securing it with screws or nails.
If you’d like better airflow, line the inside with chicken wire before attaching the boards.
Step 3: Add the Hinged Lid
Cut boards to fit the top of your bin, then connect them with two crosspieces underneath for stability.
- Attach two or three hinges along the back edge to allow for easy opening and closing.
- Add a latch or hook in front to keep animals out and stop the wind from flipping it open.
The lid keeps rain and pests out while still allowing airflow—plus, it gives the bin a clean, finished look.
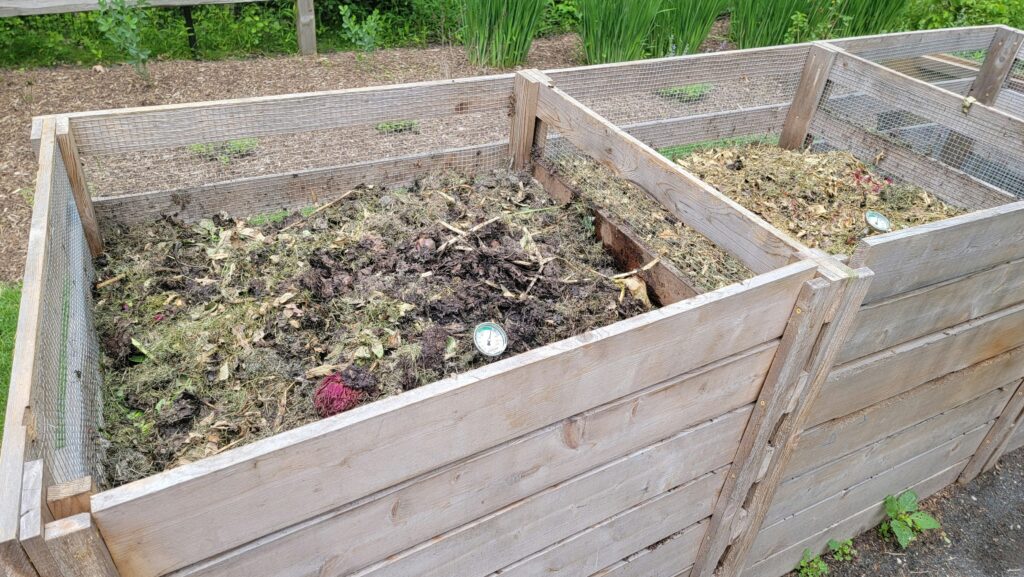
Step 4: (Optional) Divide into Sections
If you’re serious about composting, consider building a two- or three-bin system. That way, you can have one section for fresh scraps, one for compost that’s halfway done, and one for finished compost ready for your garden.
Step 5: Start Composting!
Fill your bin with a mix of:
- Greens: kitchen scraps, coffee grounds, grass clippings
- Browns: dried leaves, cardboard, straw
Turn the pile every week or two to mix air in and speed up the breakdown process. Within a few months, you’ll have dark, crumbly compost ready to feed your garden.
Simple, Sustainable, and Built to Last
Building your own wooden compost bin isn’t just a fun weekend project—it’s a small step toward a more sustainable lifestyle. You’ll waste less, save money on soil, and give back to your garden in the best way possible. Plus, every time you lift that hinged lid, you’ll know you built something useful with your own hands.