")
The Simple Way to Add a Removable Skirt to Your Raised Deck
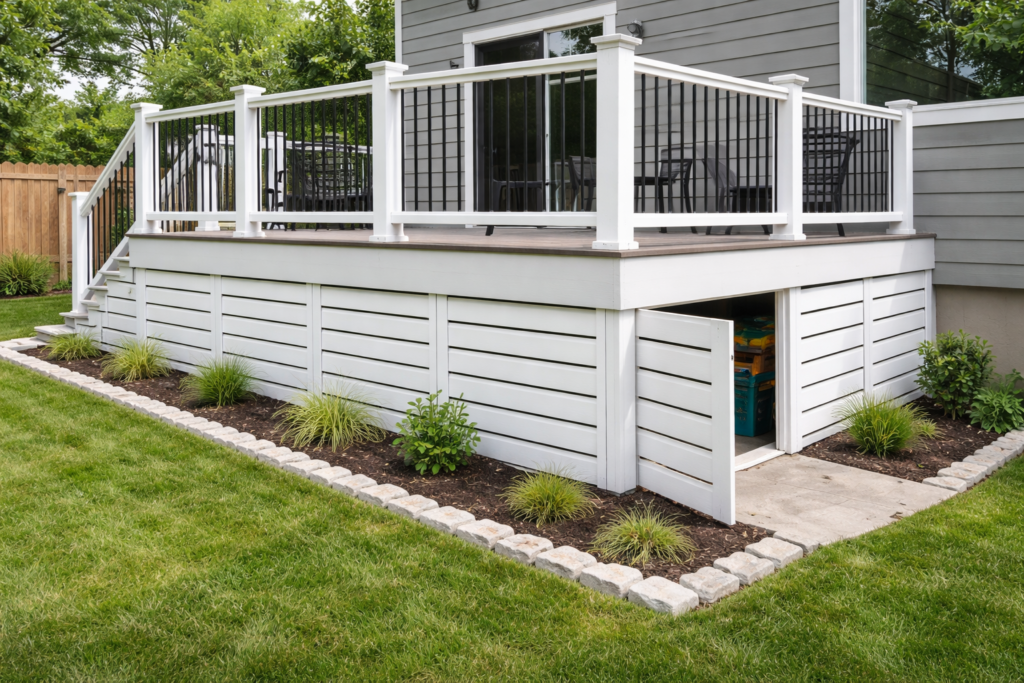
A raised deck is great for relaxing outside, but the open space underneath can be an eyesore. You might see exposed posts, weeds, or stored items you’d rather keep out of sight. That’s where a removable deck skirt comes in.
A removable skirt hides the space under your deck while still giving you access when you need it. You can reach plumbing, storage bins, or wiring without tearing everything apart.
In this guide, I’ll walk you through how to build a removable skirt around your raised deck using simple tools and materials. No complicated steps. Just a solid weekend project that makes your deck look finished.
Why Build a Removable Deck Skirt?
Before jumping into the steps, here’s why a removable design makes sense:
-
Easy access to the space under your deck
-
Improved curb appeal
-
Keeps animals out
-
Better airflow to prevent moisture problems
-
Covers storage neatly
If you’ve ever had to crawl under a deck to fix something, you already know why permanent lattice can be frustrating.
Tools and Materials You’ll Need
You don’t need anything fancy. Most of this can be found at your local hardware store.
Tools:
-
Tape measure
-
Circular saw or miter saw
-
Drill and drill bits
-
Level
-
Exterior screws
-
Safety glasses
Materials:
-
Pressure-treated 2×4 lumber (for framing)
-
Lattice panels or horizontal deck boards
-
Exterior-grade screws
-
Hinges or deck clips
-
Ground stakes (if needed)
-
Exterior paint or stain
Tip: Make sure all wood is rated for outdoor use. It will last longer and resist rot.
Step 1: Measure the Space Under Your Deck
Start by measuring the height from the ground to the bottom of the deck. Then measure the width of each side where you want skirting.
Write everything down. Double-check your numbers before cutting anything.
If your ground isn’t level, measure in a few spots. You may need to trim panels to follow the slope.
Step 2: Build Simple Frame Panels
Instead of attaching lattice directly to the deck, build framed panels. This is what makes the skirt removable.
-
Cut 2×4 boards to create a rectangular frame for each section.
-
Screw the corners together.
-
Make sure each frame fits snugly in its opening.
Keep panels small enough to handle easily. Large panels can be heavy and awkward to remove.
Step 3: Attach the Skirting Material
Now attach your lattice or deck boards to each frame.
-
Lay the frame flat.
-
Place the lattice or boards on top.
-
Secure with exterior screws.
If you want a more modern look, horizontal boards work well. For a traditional style, lattice is a simple option.
Paint or stain the panels before installing if you want a clean finish.
Step 4: Install the Panels So They’re Removable
There are a few easy ways to make the panels removable:
Option 1: Deck Clips
Attach clips to the deck posts and slide the panel into place. This holds it steady but lets you lift it out when needed.
Option 2: Hinges
Install hinges on one side to create an access door. This works well if you only need entry in one section.
Option 3: Simple Screw Method
Use a few screws at the top of each panel. When you need access, remove the screws and lift the panel out.
Choose the option that makes sense for how often you’ll need access.
Step 5: Secure the Bottom
To keep animals from pushing under the panels:
-
Let the skirt sit close to the ground
-
Add ground stakes if needed
-
Consider a small gravel border underneath
Just make sure you don’t block airflow completely. Decks need ventilation to prevent moisture buildup.
Design Ideas for a Cleaner Look
If you want your deck skirt to stand out in a good way, consider:
-
Painting it the same color as your trim
-
Using horizontal slats for a modern finish
-
Adding a small access door with a handle
-
Framing each panel evenly for a polished look
Even small upgrades can make the deck feel more finished.
Common Mistakes to Avoid
-
Using untreated wood
-
Making panels too large to remove easily
-
Blocking airflow completely
-
Forgetting to check ground slope
Take your time with measurements. Most problems happen at the measuring stage.
Final Thoughts
Building a removable skirt around your raised deck is one of those projects that makes a big difference. It cleans up the look of your yard, keeps animals out, and still lets you access the space underneath.
You don’t need advanced skills. Just careful measurements, solid framing, and a little patience.
Set aside a weekend, gather your materials, and you’ll have a deck that looks finished and functional.
If you’ve been staring at that open space under your deck for months, this is your sign to fix it.