")
Turn a Dark Garden Path Into a Glowing Walkway With Solar Lights
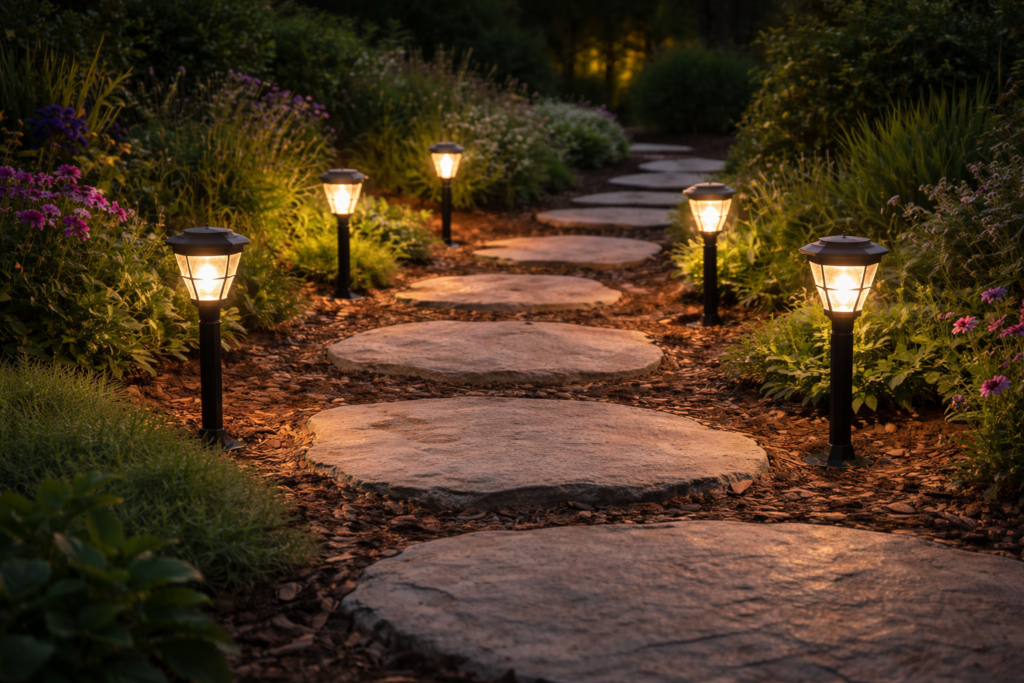
Stepping stone paths are beautiful during the day, but they can disappear once the sun goes down. Adding solar path lights is one of the easiest ways to make your walkway safer while also giving your yard a warm, welcoming glow.
The best part is that you don’t need wiring, special tools, or electrical experience. Most solar lights simply push into the ground. In less than an hour, you can turn a dark path into a softly lit walkway that looks great at night.
This guide walks you through how to install solar path lights along stepping stones step by step.
Why Add Solar Lights to a Stepping Stone Path?
Solar path lights do more than just look nice. They make your outdoor space easier and safer to use at night.
Here are a few simple benefits:
-
Improves safety by lighting the walking path
-
Adds curb appeal to your yard or garden
-
No wiring required, which keeps installation simple
-
Energy efficient since they charge during the day
-
Low maintenance once installed
They’re perfect for garden paths, backyard walkways, and front yard stepping stone trails.
Tools and Materials You’ll Need
Before you start, gather a few basic items.
-
Solar path lights
-
Garden gloves (optional but helpful)
-
Small hand shovel or trowel
-
Measuring tape (optional)
Most installations don’t require tools, but a small shovel helps if the soil is hard.
Step 1: Choose the Right Spots for Your Lights
Start by walking along your stepping stone path and deciding where the lights should go.
A good rule is to place lights beside the stones rather than directly in front of them. This keeps the path clear while still lighting the way.
Try spacing lights about 4 to 6 feet apart. This usually provides enough light without making the path look crowded.
Tip: Place lights on alternate sides of the path for a more natural look.
Step 2: Make Sure the Area Gets Sunlight
Solar lights need direct sunlight to charge properly.
Check that the spots you chose receive at least 6 hours of sunlight during the day. Avoid areas directly under thick tree branches, roof overhangs, or tall fences.
If sunlight is limited, place the lights slightly farther from the stones where they can catch more sun.
Step 3: Prepare the Ground
Before inserting the lights, check the soil.
If the ground is soft, you can usually push the stake straight in. If the soil is hard or rocky, use a small shovel or trowel to loosen the spot first.
This prevents the stake from bending or breaking during installation.
Step 4: Assemble the Solar Lights
Most solar path lights come in three pieces:
-
The light top
-
The pole
-
The ground stake
Connect the pieces according to the instructions that came with your lights. It usually takes less than a minute.
Also make sure to turn the light switch to ON before placing them outside. Many people forget this step.
Step 5: Insert the Lights Into the Ground
Now it’s time to install them.
Place the stake in the ground beside the stepping stone and press it down firmly. The light should sit straight and stable.
Repeat this process along the path, checking spacing as you go.
Stand back occasionally to see how the layout looks. Small adjustments can make the path look more balanced.
Step 6: Test the Lights at Night
Once the sun goes down, take a quick walk outside and check the lighting.
You want the path to be visible without the lights shining directly in your eyes. If a spot looks too dark, move a light slightly closer.
Solar lights are easy to adjust, so don’t worry about getting everything perfect on the first try.
Tips for a Better Look
A few small details can make your path look even better.
-
Keep lights even in height for a clean appearance
-
Wipe the solar panels occasionally so they charge well
-
Trim nearby plants that might block sunlight
-
Use warm white lights for a softer, more natural glow
These simple tweaks help your path lighting look intentional rather than random.
Final Thoughts
Installing solar path lights along stepping stones is one of the easiest outdoor upgrades you can do. There’s no wiring, no complicated tools, and the results show up the very first night.
With just a few lights placed in the right spots, your stepping stone path becomes safer, easier to follow, and much more inviting after dark.
If you’ve been looking for a quick weekend project that improves both the look and function of your yard, this is a great place to start. Your nighttime garden will thank you.